Create Cloudfront S3 signed URL with Java based Lambda
Recently, I’ve had a business requirement to restrict access to files stored in Amazon S3 bucket, which is fronted by Cloudfront distribution. The solution to this problem was to use Cloudfront signed URLs to allow users access only to certain files.
This post is a step-by-step walk-through on how to implement this functionality using java, Lambda function, S3, Cloudfront and CDK (Cloud Development Kit). It is a perfect example of serverless application approach in real life.
Complete source code for this example can be found in GitHub repo.
Table Of Contents
Architecture overview of the solution
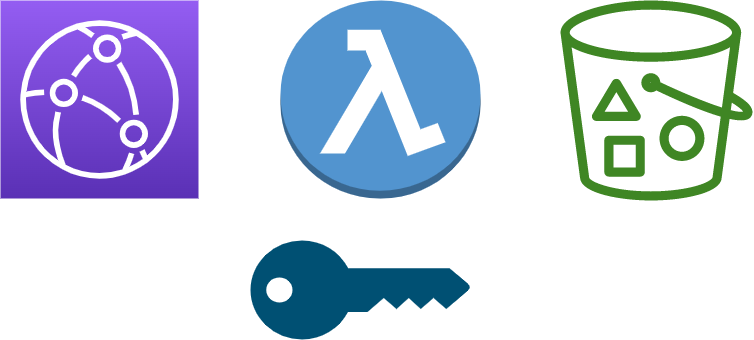
Let’s take a high level overview of the solution. Architecture is depicted in the image bellow

Architecture overview of the solution
Workflow is the following:
User invokes a Lambda function with the path to file being requested
Lambda generates signed URL and returns it to user
User uses this URL to get the file from Cloudfront
Cloudfront fetches the requested file from S3
Note: One thing missing here is the front end for user interaction with Lambda. We omit it here to simplify things. In real world, you would need to have API Gatway or something similar in front of Lambda, so it can be invoked externaly.
Basic concepts behind Cloudfront signed URLs
Cloudfront signed URLs allow you to restrict access to certain objects in Cloudfront. They can include additional data, like expiration date.
Signed URLs work in the following way:
You specify key groups in Cloudfront which contain public keys that will be used to verify signatures in URL
Application logic determines if user should have access to requested file. In our case, this is a lambda function
If user is authorized to access, application generates URL and signs it with a private key
User uses the URL to access the object and Cloudfront uses public key from key group to verify the signature. If signature is valid, user is allowed access.
Choose policy type for signed URLs
Each signed URL is connected with a security policy. There are two types of policies supported by Cloudfront: canned policy and custom policy
canned policy is simple policy type that can be applied to single resource (file) only. It allows you to specify expiration time, ie. when user access stops working
custom policy is more flexible. It can refer to multiple files, can be restricted by IP range and specify when access can be valid from
The following table summarizes the differences:
| Description | Canned policy | Custom policy |
|---|---|---|
| Can be reused for multiple files, can use wildcards | No | Yes |
| Can specify time when access begins | No | Yes |
| Can specify time when access ends | Yes | Yes |
| Can specify IP address range allowed to access | No | Yes |
| Signed URL includes encoded policy | No | Yes |
In general, if you have simple requirements, canned policy is the best bet. If you need something more flexible, you will need to use custom policy
Setting up AWS infrastructure
First order of business is to setup infrastructure for the solution. We will use AWS CDK as IaC (Infrastrucure as Code) tool to automate provisioning of cloud resources.
Create signing keys
Before we begin creating infrastructure, we need to create keys for signing URLs. For this, we will use openssl to generate keys. We will store them inside keys directory inside our project.
First, we will generate private key. Run the following command to generate it:
openssl genrsa -out private_key.pem 2048
This will generate private key in file private_key.pem. This file contains both private and public keys.
Next, we will extract public key from private key file:
openssl rsa -in private.pem -pubout -outform PEM -out public_key.pem
This command will extract public key and store it in file public_key.pem.
Finally, we need to convert public key into PKCS8 format, which Java can read. We will also do this using OpenSSL:
openssl pkcs8 -topk8 -inform PEM -in private_key.pem -out private_key_pkcs8.pem -nocrypt
This will store private key in file private_key_pkcs8.pem.
Initialize CDK app
In project root directory, create directory named cdk. This is where we will store CDK files.
Inside this directory, run the following command:
cdk init app --language typescript
This will create scaffolding for application infrastructure.
Create S3 bucket and Cloudfront distribution
First, we will create an S3 bucket to hold our files and a Cloudfront distribution to allow access to it. We need to add the following code to lib/cdk-stack.ts file:
 const bucket = new s3.Bucket(this, 'bucket-for-testing', {
      blockPublicAccess: BlockPublicAccess.BLOCK_ALL,
      bucketName: "cf-s3-presigned-test-bucket",
      removalPolicy: RemovalPolicy.DESTROY,
      autoDeleteObjects: true
    })

    const cdIdentity = new cf.OriginAccessIdentity(this, 'cd-aoi', {
      comment: "OAI for CF distro",
    })

    bucket.addToResourcePolicy(new PolicyStatement({
      actions: ['s3:GetObject'],
      resources: [bucket.arnForObjects('*')],
      principals: [new CanonicalUserPrincipal( cdIdentity.cloudFrontOriginAccessIdentityS3CanonicalUserId)]
    }))

 const cfDistro = new cf.Distribution(this, 'pre-sign-dist', {
      defaultBehavior: {
        origin:  new cfo.S3Origin(bucket,{
          originAccessIdentity: cdIdentity
        }),
        viewerProtocolPolicy: ViewerProtocolPolicy.HTTPS_ONLY
      }
    })
This will create an S3 bucket which does not allow any public access. We then create Origin Access Identity (OAI) to allow Cloudfront to access objects in S3 bucket. In addition, we need to add the policy to S3 bucket to allow OAI rad-only access to the bucket.
Finally, we create Cloudfront distribution which allows public access to S3 bucket.
There is a file sample.html in source project root. You can upload this file to S3 bucket and access it using Cloudfront.
If you go to Cloudfront console, you can check a domain for accessing the files. This is shown in the screenshot bellow.
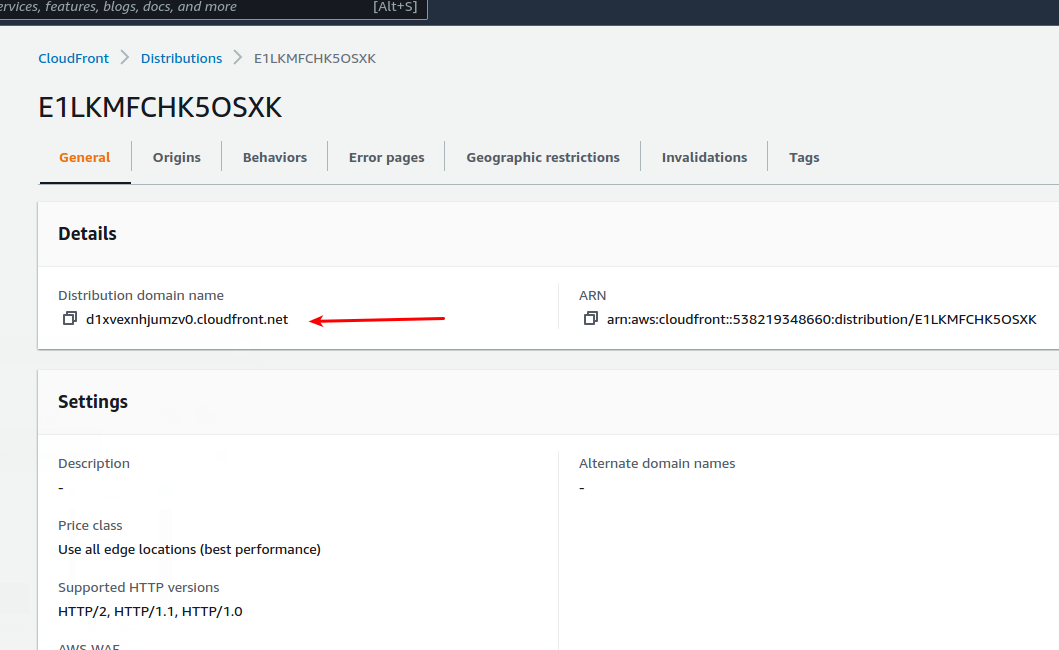
You can not access the file using URL like https://<domain-name>/sample.html. Result is shown in the image bellow:
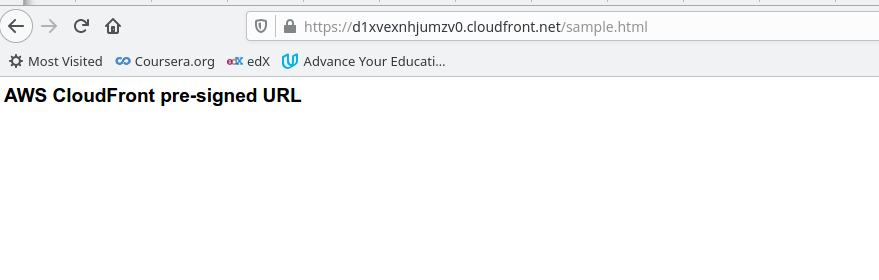
Publicly accessible file through Cloudfront
Create signing keys to restrict access to Cloudfront
Our files are now publicly accessible through Cloudfront, which is what we want to avoid. In order to restrict access to files, we need to create key pair for signing.
const pubKeyFile = readFileSync('../keys/public_key.pem')
const publicKey = new cf.PublicKey(this, 'cf-presigned-pubkey', {
    encodedKey: pubKeyFile.toString()
})

const cfKeyGroup = new cf.KeyGroup(this, 'cf-keygroup', {
    items: [publicKey]
})
// create private key
const privateKeyFile = readFileSync('../keys/private_key_pkcs8.pem')
const privKeyValue = secretsmanager.SecretStringValueBeta1.fromUnsafePlaintext(privateKeyFile.toString())
const privateKeySecretName = 'cf-secret-name'
const privateKeySecret = new secretsmanager.Secret(this, 'cf-priv-key', {
    secretStringBeta1: privKeyValue,
    secretName: privateKeySecretName,
    removalPolicy: RemovalPolicy.DESTROY,

})

const cfDistro = new cf.Distribution(this, 'pre-sign-dist', {
    defaultBehavior: {
    origin:  new cfo.S3Origin(bucket,{
        originAccessIdentity: cdIdentity
    }),
    trustedKeyGroups: [cfKeyGroup],
    viewerProtocolPolicy: ViewerProtocolPolicy.HTTPS_ONLY
    }
})
Here, we first create public key from the public key file we create in first step. This key is added to key group in Cloudfront.
As a next step, we store private key in AWS Secrets Manager. This is used so we can safely store the key and access it from other AWS services.
Finally, we set created key group as a trusted key group in Cloudfront. This will force Cloudfront to validate HTTP requests before allowing access to files.
If you now try to access the file we uploaded previously, you will get the following error:
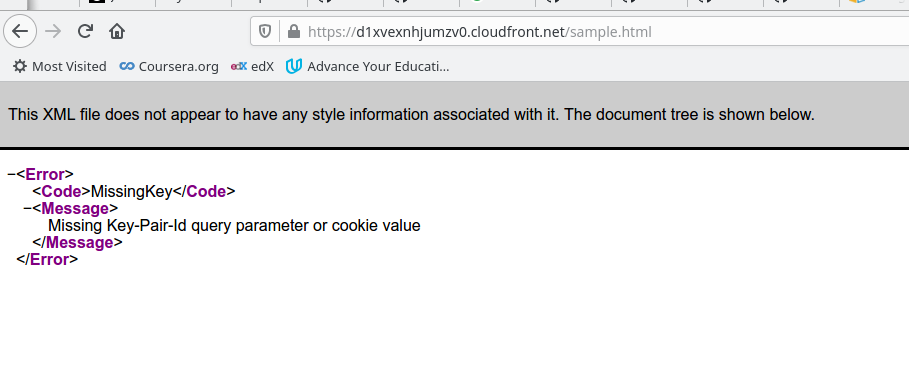
Public access to Cloudfront is disabled
Create Lambda function to generate signed URLs
Final step is setting up a Lambda function to generate signed URL. Input to this function will be file path relative to the bucket.
 const lambdaFunction = new lambda.Function(this, 'presign-url-lambda', {
    runtime: lambda.Runtime.JAVA_11,
    handler: 'co.bitshifted.samples.PreSignedUrlHandler',
    code: lambda.Code.fromAsset(path.join('../target', 'cf-s3-lambda-presigned-url-1.0.0-SNAPSHOT.jar')),
    memorySize: 256,
    timeout: Duration.minutes(1),
    environment: {
    "CF_DISTRO_BASE_URL": cfDistro.distributionDomainName,
    "PRIVATE_KEY_SECRET_NAME": privateKeySecretName,
    "CF_KEYPAIR_ID": publicKey.publicKeyId
    }
})
lambdaFunction.addToRolePolicy(new PolicyStatement({
    actions: ["secretsmanager:GetSecretValue"],
    resources: [privateKeySecret.secretArn],
    effect: Effect.ALLOW
}))
Here we configure Lambda function with policy to access private key from Secrets Manager. Function source code is pulled from Java shaded jar file.
We also set up environment variables to hold private key secret name, public key ID and distribution base URL.
Write Lambda function code to create signed URLs
Now that we have infrastructure in place, we need to write a function code to create signed URLs. We will be using canned policy for access. The way function works is the following:
Functions pulls private key from Secrets Manager
Extracts file path from input event
Populate caned policy with resource URL and expiration time stamp
Function signs the policy with private key and generates final URL
Canned policy base JSON
Policy is a JSON document conforming to IAM policy specification. For our purposes, we will create JSON policy with placeholders for resource URL and expiration time.
{
  "Statement":[
    {
      "Resource": "%s",
      "Condition":{
        "DateLessThan":{
          "AWS:EpochTime": %d
        }
      }
    }
  ]
}
In function code, we will be replacing placeholders with resource URL string and number for expiration epoch time in UTC.
Fetching private key from Secrets Manager
First step we need to do is fetch private key from Secrets Manager and convert it to Java private key format. We will create PrivateKeyHandler to do this:
public class PrivateKeyHandler {

    public static PrivateKey readKey(String pem)  throws Exception{
        var sb = new StringBuilder();
        try (var reader = new BufferedReader(new StringReader(pem))) {
            String line;
            while((line = reader.readLine()) != null) {
                if(!line.contains("PRIVATE KEY")) {
                    sb.append(line);
                }
            }
        }
        var key = sb.toString();
        byte[] encoded = Base64.getDecoder().decode(key);
        var factory = KeyFactory.getInstance("RSA");
        var keySpec = new PKCS8EncodedKeySpec(encoded);
        return factory.generatePrivate(keySpec);
    }
}
First part of readKey method is used to extract private key data. This is the data between BEGIN RSA PRIVATE KEY and END RSA PRIVATE KEY markers in PEM file.
After we extract this, we use it to create a private key for signing the policy.
Creating and signing canned policy
Class CloudfrontUrlSigner is used to sign the generated policy and generate signed URL.
private static final String RESOURCE_PATH_FORMAT = "https://%s/%s";
private static final String URL_FORMAT = "https://%s/%s?Expires=%d&Signature=%s&Key-Pair-Id=%s";

 public void sign(String path, Duration duration, PrivateKey privateKey, String domain, String keyPairId) throws Exception {
    var expiration = getExpiration(duration);
    var resourcePath = String.format(RESOURCE_PATH_FORMAT, domain, path);
    var policy = buildCannedPolicy(resourcePath, expiration);
    System.out.println("Policy: " + policy);
    byte[] signatureBytes = signWithSha1Rsa(policy.getBytes(StandardCharsets.UTF_8), privateKey);
    String urlSafeSignature = makeBytesUrlSafe(signatureBytes);
    var url = String.format(URL_FORMAT, domain, path, expiration, urlSafeSignature, keyPairId);
    System.out.println("Signed URL: " + url);
}

private long getExpiration(Duration duration) {
    return ZonedDateTime.now(ZoneId.of("UTC")).plus(duration).toInstant().getEpochSecond();
}

private String buildCannedPolicy(String resourcePath, long expires) {
    var policy = String.format(cannedPolicy, resourcePath, expires).replaceAll("\\s+", "");
    return policy;
}

private byte[] signWithSha1Rsa(byte[] dataToSign,
                                        PrivateKey privateKey) throws InvalidKeyException {
    Signature signature;
    try {
        signature = Signature.getInstance("SHA1withRSA");
        signature.initSign(privateKey, srand);
        signature.update(dataToSign);
        return signature.sign();
    } catch (NoSuchAlgorithmException | SignatureException e) {
        throw new IllegalStateException(e);
    }
}

private String makeBytesUrlSafe(byte[] bytes) {
    byte[] encoded = java.util.Base64.getEncoder().encode(bytes);

    for (int i = 0; i < encoded.length; i++) {
        switch (encoded[i]) {
            case '+':
                encoded[i] = '-';
                continue;
            case '=':
                encoded[i] = '_';
                continue;
            case '/':
                encoded[i] = '~';
                continue;
            default:
                continue;
        }
    }
    return new String(encoded, StandardCharsets.UTF_8);
}
Method getExpiration returns Unix epoch time in UTC time zone which denotes URL expiration time.
Method buildCannedPolicy will build a policy by replacing resource URL and expiration time placeholders with actual values. Note that we also remove all white spaces from policy. This is important for successful validation.
As it’s name says, method signWithSha1Rsa signs the policy with private key. It returns byte array representing the signature.
Finally, method makeBytesUrlSafe replaces characters +, = and / with -, _, and ~ respectively. This is important so we can use the signature as part of URL.
All these methods are combined in sign method which finally prints signed URL.
Lambda handler
Final piece of the puzzle is creating handler for Lambda function. Code is shown bellow:
private static final String PRIVATE_KEY_SECRET_VAR_NAME = "PRIVATE_KEY_SECRET_NAME";
private static final String CF_DISTRO_DOMAIN_VAR_NAME = "CF_DISTRO_BASE_URL";
private static final String KEYPAIR_ID_VAR_NAME = "CF_KEYPAIR_ID";

@Override
public String handleRequest(InputData input, Context context) {
    var privateKeySecretName = System.getenv(PRIVATE_KEY_SECRET_VAR_NAME);
    var domainName = System.getenv(CF_DISTRO_DOMAIN_VAR_NAME);
    var keypairId = System.getenv(KEYPAIR_ID_VAR_NAME);
    var client = SecretsManagerClient.builder().region(Region.EU_CENTRAL_1).build();

    var secretRequest = GetSecretValueRequest.builder().secretId(privateKeySecretName).build();
    var secretResponse = client.getSecretValue(secretRequest);

    try {
        var privKey = PrivateKeyHandler.readKey(secretResponse.secretString());
        var signer = new CloudfrontUrlSigner();
        var url = signer.sign(input.getPath(), Duration.ofDays(7), privKey, domainName, keypairId);
        return url;
    } catch (Exception ex) {
        ex.printStackTrace();
        throw new RuntimeException(ex);
    }
}
Handler is quite simple. It fetches values of environment variables which contain data for signing. It then pulls private key from Secrets Manager. Finally it calls signer method to generate the URL.
Final result
Finally, we can try out whole process. We will invoke Lambda function with an event like
{
    "path": "sample.html"
}
Lambda will output signed URL in the console. If you paste this URL to the browser, the result should be like this:

Cloudfront file access using signed URL
If you look at the URL in the address bar, you will note that we are using signed URL.
Closing thoughts
This was long and winded, but we finally made it. I hope this was helpful to you.
As I mentioned earlier, this flow lacks a front end for interacting with Lambda function. I might get back to it in one of the future posts.
If you have any thoughts and comments, don’t hesitate to write. Just post a comment using the form bellow.