Hosting static site on AWS with S3, Cloudfront, Route 53 and ACM

Hosting static websites on AWS is an efficient and cost-effective way to deliver your content to the web. By leveraging AWS, you can avoid the pain of having to manage your own web servers. Using services like S3, Cloudfront, Route 53 and ACM (Amazon Certificate Manager), you can deploy performant, secure and reliable website in minutes.
In this blog post, we will go through the process of deploying the website to AWS, incrementally adding new features. We will use Cloudformation to automate the deployment process.
In order to follow this tutorial, you will need:
- an AWS account
- AWS CLI installed on your machine
- basic knowledge of YAML and Cloudformation
Complete source code for this blog post can be found in Github repository.
Simple static site hosting with S3
The simplest way to host a static site in AWS is to use S3. S3 buckets have a mode that allows hosting static web site. The following Cloudfront template shows how to configure S3 bucket for web site hosting:
AWSTemplateFormatVersion: '2010-09-09'
Description: AWS CloudFormation Template to host a static website on S3

Resources:
  WebsiteBucket:
    Type: AWS::S3::Bucket
    Properties:
      BucketName: static-site-bitshift-eu-central-1
      PublicAccessBlockConfiguration:
          BlockPublicAcls: false
      OwnershipControls:
        Rules:
          - ObjectOwnership: ObjectWriter
      WebsiteConfiguration:
        IndexDocument: index.html
        ErrorDocument: error.html

  BucketPolicy:
    Type: AWS::S3::BucketPolicy
    Properties:
      Bucket: !Ref WebsiteBucket
      PolicyDocument:
        Statement:
          - Sid: PublicReadGetObject
            Effect: Allow
            Principal: '*'
            Action:
              - s3:GetObject
            Resource:
              - !Sub "arn:aws:s3:::${WebsiteBucket}/*"

Outputs:
  WebsiteURL:
    Value: !GetAtt WebsiteBucket.WebsiteURL
Description: URL of the static website hosted on AWS S3Resources section, we first configure an S3 bucket with name static-site-bitshift-eu-central. We need to allow public access to the bucket, so our visitors can access the site. Finally, we specify our index and error files for the site.Next, we need to allow access to objects in the bucket, ie. website files. This is what BucketPolicy section is for. After that, we have Outputs section which will show the URL of our site.
To deploy this template, run the following command:
aws cloudformation update-stack --stack-name static-site-hosting --template-body file://s3-simple-site.yaml
This command will create the stack, which contains the bucket. Once the bucket is created, we need to upload website files. In the Github repo for this post, you can find sample index and error files.
If you now go to the website URL (generated in Cloudformation Output section), you should get something like this:
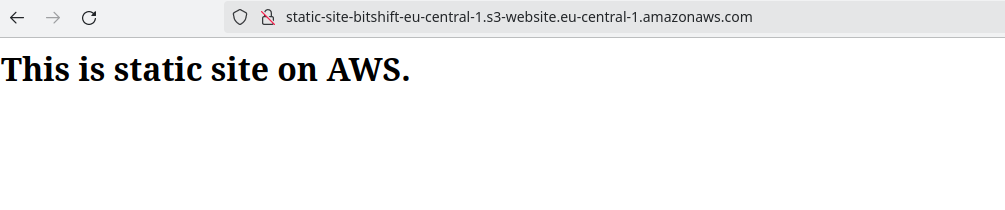
Static site hosted in S3
You now have completely functional site in S3.
Optimizing performance with Cloudfront
Although our site is fully functional, there are some drawbacks here:
- It is hosted in a single region, so users who are located far away from the region will experience latency accessing the site
- there are security considerations when we allow public access to the bucket
- if the site has a lot of visitors, it can incurr significant cost due to S3 access operations and sending traffic to internet
The solution here is to use Cloudfront. Cloudfront is a CDN (Content Delivery Network), and it helps improve performance of our website by caching frequently accessed assets in edge locations near to the user.
In addition, Cloudfront can help secure access to our S3 bucket. We can block public access to S3 bucket and only allow access from Cloudfront.
Finally, it can help us reduce cost. Cost for outgoing traffic for Cloudfront is lower than for S3, and it is tiered, meaning the price goes down with increase in traffic. As an added bonus, you get 1TB of bandwidth free with Cloudfront.
In order to secure our bucket, we need to disable public access and create Origin Access Identity (OAI). This identity allows Cloudfront to access bucket content and serve it to users. Blocking public access to the bucket also disables direct user access to the bucket, meaning that user need to access the site only through Cloudfront.
We need to modify our Clodformation template to disable public access to bucket, create OAI and configure Cloudfront distribution:
AWSTemplateFormatVersion: '2010-09-09'
Description: AWS CloudFormation Template to host a static website on S3

Resources:
  WebsiteBucket:
    Type: AWS::S3::Bucket
    Properties:
      BucketName: static-site-bitshift-eu-central-1
      WebsiteConfiguration:
        IndexDocument: index.html
        ErrorDocument: error.html

  SiteOAI:
    Type: AWS::CloudFront::CloudFrontOriginAccessIdentity
    Properties:
      CloudFrontOriginAccessIdentityConfig:
        Comment: !Sub "OAI for ${AWS::StackName} website"

  BucketPolicy:
    Type: AWS::S3::BucketPolicy
    Properties:
      Bucket: !Ref WebsiteBucket
      PolicyDocument:
        Statement:
          - Sid: AllowCloudFrontAccess
            Effect: Allow
            Principal:
              AWS: !Sub "arn:aws:iam::cloudfront:user/CloudFront Origin Access Identity ${SiteOAI}"
            Action:
              - s3:GetObject
            Resource: !Sub "${WebsiteBucket.Arn}/*"

  CloudFrontDistribution:
    Type: AWS::CloudFront::Distribution
    Properties:
      DistributionConfig:
        Origins:
          - DomainName: !GetAtt WebsiteBucket.DomainName
            Id: S3-WebsiteBucket
            S3OriginConfig:
              OriginAccessIdentity: !Sub "origin-access-identity/cloudfront/${SiteOAI}"
        Enabled: true
        DefaultRootObject: index.html
        DefaultCacheBehavior:
          TargetOriginId: S3-WebsiteBucket
          ViewerProtocolPolicy: redirect-to-https
          ForwardedValues:
            QueryString: false
            Cookies:
              Forward: none
          AllowedMethods:
            - GET
            - HEAD
          Compress: true
        ViewerCertificate:
          CloudFrontDefaultCertificate: true

Outputs:
  WebsiteURL:
    Description: "CloudFront Distribution URL for the static website"
Value: !Sub "https://${CloudFrontDistribution.DomainName}/"PublicAccessBlockConfiguration from the bucket. Then, we create OAI for Cloudfront access. Bucket policy needs to be modified to allow OAI to access objects in the bucket.Finally, we create the Cloudfront distribution. We set S3 bucket as the origin, and set the OAI for access. We also configure some parameters for the distribution.
If you notice the ViewerProtocolPolicy: redirect-to-https setting, it will force redirect to HTTPS connection even if user types HTTP based URL. This improves security and trustworthiness of the site. Cloudfront certificate is used for HTTPS connection.
With this new template, we simply need to update our currently deployed stack:
aws cloudformation update-stack --stack-name static-site-hosting \
 --template-body file://02-cloudfront-site.yaml
When stack is updated, you can take a look at the Outputs section of the Cloudformation console. You will get new site URL, which is actually URL of CLoudfront distrubition:
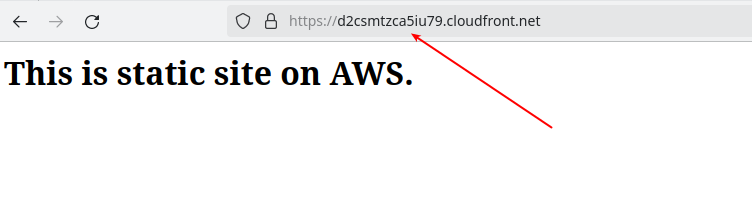
Static site with Cloudfront
Notice that URL is different. It is no longer S3 bucket URL, but rather Cloudfront URL. If you now try to access site directly through S3 bucket, you should get an error like this:
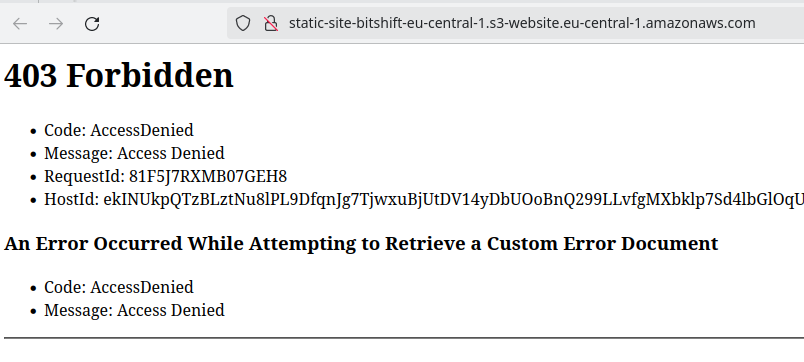
Accessing site directly through S3 is blocket
Now you have fully secure and compliant static web site, all with CDN for caching.
Connecting your own domain name
So far, everything is fine and dandy. But, if our users want to visit our site, they need to remember that ugly, long Cloudfront URL. Not very good if you want to retain visitors! You need to have a domain name you can use for the site.
Fortunatelly, AWS can help with this, namely using Route 53. It is DNS service which allows registration and management of domains and DNS records. We will couple Route 53 with Amazon Certificate Manager(ACM), a service which allows issuing and managing SSL/TLS certificates for web sites.
The reson we need ACM is that we currently use Cloudfront certificate for HTTPS connection, but if we use custom domain name, it is no longer valid. We need to have a certificate for our own domain.
For purposes of this post, I will assume that you already have a domain registered with Route 53. If you don’t, you can follow this step-by-step guide to register domain in Route 53.
Create TLS certificate in ACM
This step needs to be done manually. Cloudfront distribution expects TLS certificate to be in us-east-1 region, regardless of distribution region. In addition, you need to validate your domain in by using DNS records, which needs to be done manually.
In order to create a certificate, go to ACM console, and choose Request certificate button. Make sute you are in us-east-1 region (North Virginia).
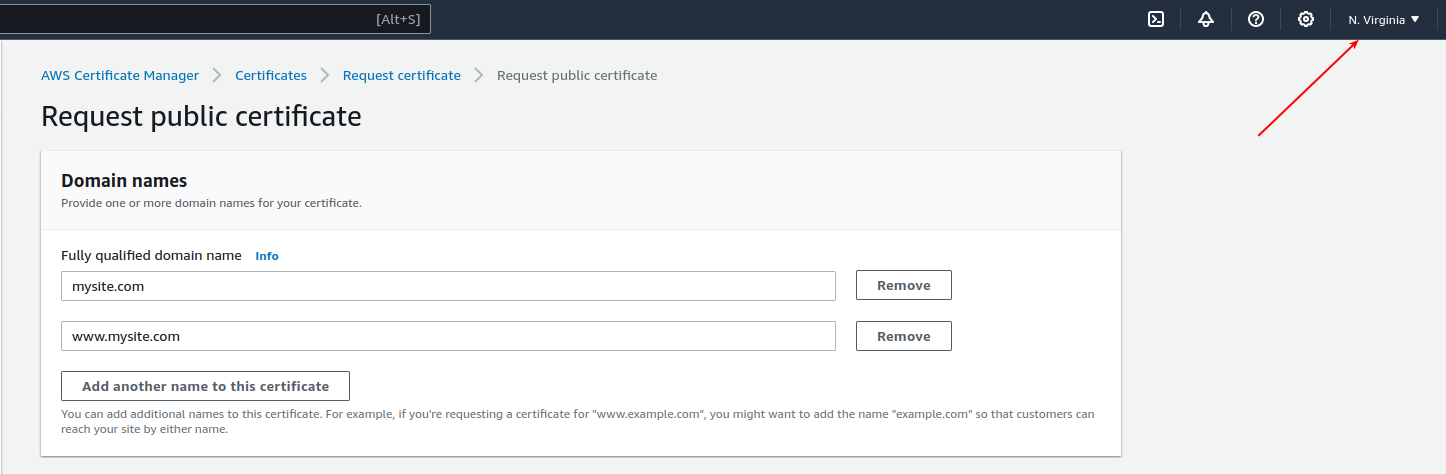
Enter your domain name, both top-level and www version. Certificate will cover both versions.
Once the certificate is requested, you will need to add correct DNS records in Route 53 for domain validation. You can also do this from within ACM, when you click on the certificate. Look at the image bellow:
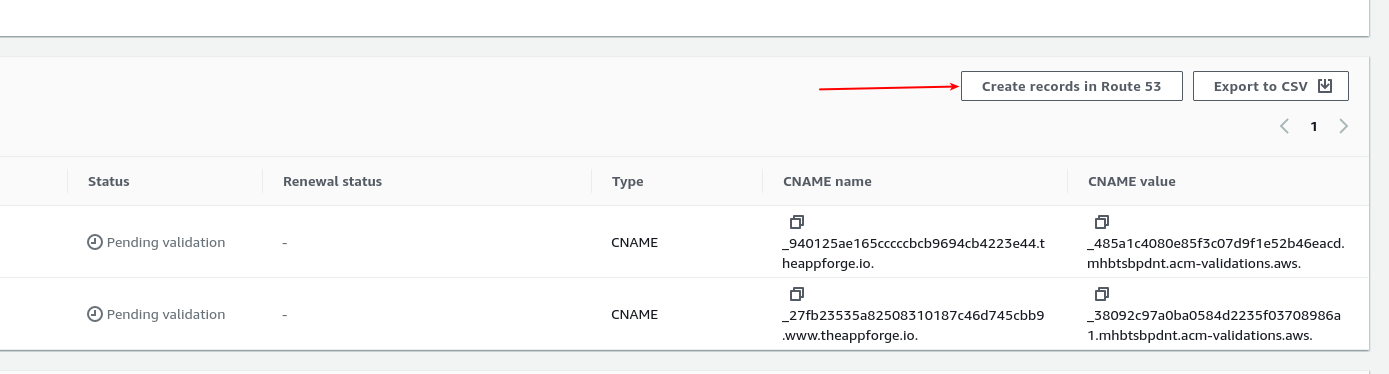
Once the recods are created, your certificate should be validated.
Add Route 53 resource to Cloudformation template
All we need to do is modify our Cloudformation template to include Route 53 and point to ACM certificate.
AWSTemplateFormatVersion: '2010-09-09'
Description: AWS CloudFormation Template to host a static website on S3


Parameters:
  DomainName:
    Type: String

  HostedZoneId:
    Type: String
    Description: The Route 53 Hosted Zone ID for the domain.

  CertificateArn:
    Type: String
    Description: TLS certificate for Cloudfront distribution

Resources:
  WebsiteBucket:
    Type: AWS::S3::Bucket
    Properties:
      BucketName: static-site-bitshift-eu-central-1
      WebsiteConfiguration:
        IndexDocument: index.html
        ErrorDocument: error.html

  SiteOAI:
    Type: AWS::CloudFront::CloudFrontOriginAccessIdentity
    Properties:
      CloudFrontOriginAccessIdentityConfig:
        Comment: !Sub "OAI for ${AWS::StackName} website"

  BucketPolicy:
    Type: AWS::S3::BucketPolicy
    Properties:
      Bucket: !Ref WebsiteBucket
      PolicyDocument:
        Statement:
          - Sid: AllowCloudFrontAccess
            Effect: Allow
            Principal:
              AWS: !Sub "arn:aws:iam::cloudfront:user/CloudFront Origin Access Identity ${SiteOAI}"
            Action:
              - s3:GetObject
            Resource: !Sub "${WebsiteBucket.Arn}/*"


  CloudFrontDistribution:
    Type: AWS::CloudFront::Distribution
    Properties:
      DistributionConfig:
        Aliases:
          - !Ref DomainName
          - !Sub "www.${DomainName}"
        Origins:
          - DomainName: !GetAtt WebsiteBucket.DomainName
            Id: S3-WebsiteBucket
            S3OriginConfig:
              OriginAccessIdentity: !Sub "origin-access-identity/cloudfront/${SiteOAI}"
        Enabled: true
        DefaultRootObject: index.html
        DefaultCacheBehavior:
          TargetOriginId: S3-WebsiteBucket
          ViewerProtocolPolicy: redirect-to-https
          ForwardedValues:
            QueryString: false
            Cookies:
              Forward: none
          AllowedMethods:
            - GET
            - HEAD
          Compress: true
        ViewerCertificate:
          AcmCertificateArn: !Ref CertificateArn
          SslSupportMethod: sni-only
          MinimumProtocolVersion: TLSv1.2_2019

  DNSRecord:
    Type: AWS::Route53::RecordSetGroup
    Properties:
      HostedZoneId: !Ref HostedZoneId
      RecordSets:
        - Name: !Ref DomainName
          Type: A
          AliasTarget:
            HostedZoneId: Z2FDTNDATAQYW2 # This is the CloudFront hosted zone ID
            DNSName: !GetAtt CloudFrontDistribution.DomainName
        - Name: !Sub "www.${DomainName}"
          Type: A
          AliasTarget:
            HostedZoneId: Z2FDTNDATAQYW2 # This is the CloudFront hosted zone ID
            DNSName: !GetAtt CloudFrontDistribution.DomainName

Outputs:
  WebsiteURL:
    Description: "CloudFront Distribution URL for the static website"
    Value: !Sub "https://${CloudFrontDistribution.DomainName}/"
This version of template has several parameters added. You need to set values for these when you update the stack. Parameters are:
DomainName- domain name of the web siteHostedZoneId- ID of the Route 53 hosted zoneCertificateArn- ARN of the certificate created in previous step
To update the stack, run the following command which includes parameters:
 aws cloudformation update-stack --stack-name static-site-hosting --template-body file://03-complete-site.yaml  --parameters \
  ParameterKey=DomainName,ParameterValue=mysite.com ParameterKey=HostedZoneId,ParameterValue=Z1234567890 \
   ParameterKey=CertificateArn,ParameterValue=arn:aws:acm:us-east-1:XXX:certificate/xxxx-yyyy-zzzzzzz-www
Parameters are specified in format ParameterKey=key,ParameterValue=value, where multiple parameters are separated by spaces.
Important: Note the value for HostedZoneId (Z2FDTNDATAQYW2) in RecordSet for Route 53. This is fixed value that you should always use when targety is Cloudfront distribution. This is specified in
AWS documentation for Cloudformation.
Once the stack update is finished, you can point your browser to your domain (eg. www.mysite.com), and the site should load correctly. If you check the certificate, it should be valid for the site.
Conclusion
As you can see, deploying static site to AWS is pretty straight forward. You get a stable and performant site, without the headache of maintaining servers. And by using Cloudformation, you can automate the whole process.
If you have any questions or thoughts about this post, don’t hesitate to comment.